What Is a Trading Combine? Rules, Costs, and Payouts

A trader can call the market direction perfectly and still fail an evaluation before lunch. One oversized position, one attempt to win back a red trade, or one ignored drawdown rule can end the account. So, what is trading combine? In practical terms, it is a performance evaluation used by a proprietary trading firm to determine whether you can trade with defined risk before being given access to a funded account.

For retail futures traders, a trading combine can be a lower-cost way to pursue larger buying power without putting thousands of dollars of personal savings directly at risk. But it is not free capital, and it is not a shortcut around learning how to trade. It is a rules-based test of execution, patience, and risk control.

What Is a Trading Combine in Futures Trading?

A trading combine is often another name for a prop-firm evaluation. You pay a subscription or evaluation fee, select an account size, and trade in a simulated environment under the firm’s rules. Your goal is usually to reach a profit target while staying within limits for drawdown, daily losses, position size, and minimum trading days.

If you complete the requirements without violating a rule, the firm may move you into a funded stage. Depending on the firm and program, that can begin as a performance account, a simulated funded account, or a live account. The exact account structure matters, so read the current terms before signing up rather than assuming every firm operates the same way.

The key idea is simple: the firm is not only looking for profitable trades. It is looking for evidence that you can protect capital. A trader who makes $3,000 by taking reckless risk is not necessarily more valuable than a trader who makes $1,500 with clean execution and controlled losses.

Why Prop Firms Use Combines

Prop firms need a way to screen traders. They cannot reasonably hand a new trader a large account and hope discipline shows up after the fact. The combine creates a measurable process: trade within the rules, demonstrate consistency, and prove you can handle losing trades without abandoning your plan.

That structure can be valuable for traders, too. Many retail traders struggle because their only rules are based on emotion. They trade larger after a loss, move stops, add to bad positions, or keep clicking because they feel they need a green day. An evaluation forces the issue. You either have a risk plan, or the drawdown rule exposes that you do not.

This is why passing a combine is less about finding a magic indicator and more about becoming consistent. Good charting, market context, and timing matter. But they only matter when your position size gives the trade room to work and your daily loss limit keeps one bad session from turning into a blown account.

The Rules That Usually Matter Most

Every prop firm writes its own rules, but most combines center on the same few measurements. Before placing a single trade, understand how each one is calculated.

Profit target

The profit target is the amount you need to make to pass. For example, an evaluation might require a trader to earn a set dollar amount before moving on. The mistake is treating that number like a deadline that must be hit today. Pressing for the target usually creates poor entries and oversized risk.

A stronger approach is to focus on repeatable daily execution. If your setup produces one or two quality opportunities in the morning, take those trades according to plan and let the target become the result of good process.

Drawdown

Drawdown is the rule that gets the most traders. It represents how much an account can decline before it fails. Some firms use a trailing drawdown that follows your highest account balance upward. Others use an end-of-day drawdown or a static threshold. Those differences are not small details. They directly change how you should manage winners, stops, and position size.

Suppose your account earns a quick profit early in the evaluation. A trailing drawdown can rise with that high-water mark, leaving less room for a careless reversal. That means a big green day is not permission to get loose. It is often a reason to get more protective.

Daily loss limit and position size

A daily loss limit caps how much you can lose in one trading session. Position limits control how many contracts you can trade. Together, these rules are designed to prevent one emotional sequence from causing maximum damage.

Do not build your strategy around the maximum allowed size. The maximum is a ceiling, not a recommendation. A trader using fewer contracts with a defined stop can survive normal losing streaks. A trader who starts at maximum size may have no room to make a second decision.

Consistency and minimum-day requirements

Some combines require you to trade for a minimum number of days. Others may limit the percentage of total profits that can come from one day. These rules discourage a trader from passing through one lucky, high-risk session.

That can feel frustrating when you are ready to move on, but it reinforces the right skill. Funded trading is not about one home-run trade. It is about showing up, waiting for your edge, and managing the account like it matters.

What a Smart Combine Plan Looks Like

The fastest way to make an evaluation harder is to trade it like a personal challenge. The goal is not to prove you can make money in a single day. The goal is to finish the program with the account intact.

Start by knowing your personal loss limit, which should be smaller than the firm’s maximum. If the firm allows a $1,000 daily loss, your plan might stop at $250 or $300. That buffer protects you from slippage, mistakes, and the urge to revenge trade.

Next, define the setups you are actually allowed to take. Maybe you trade a trend continuation after a pullback, a key level rejection, or a breakout with confirmation. Keep it narrow. The more random setups you accept, the harder it becomes to review what is working.

Then decide when you are done for the day. A daily target can help, but it should not become a reason to force trades. Some of the best trading days end after one clean setup. Protecting a small gain is often more valuable than turning a good morning into a breakeven afternoon.

This is where a structured community and live coaching can help. CK Trader Pro teaches traders to pair market education and TradingView-based tools with prop-firm-specific risk management, because a chart setup only helps if you can execute it inside the evaluation rules.

Trading Combine Costs and the Real Trade-Off

A combine usually costs far less than funding a meaningful futures account yourself. That is the appeal. Instead of risking a large personal account while you learn, you can pay for an evaluation and attempt to qualify under the firm’s structure.

Still, low upfront cost does not mean low total cost. Evaluation fees, monthly renewals, resets, activation fees, market data charges, and payout rules can all affect the experience. If you repeatedly fail accounts because you overtrade, several inexpensive evaluations can become expensive fast.

There is also a psychological trade-off. Evaluation rules can make traders so afraid of failing that they cut every winner early or avoid valid setups. The answer is not to trade scared. It is to use position size small enough that following your plan feels emotionally manageable.

Common Reasons Traders Fail

Most failed combines do not come from a lack of market knowledge. They come from execution errors. Traders chase a move after missing an entry, average down without a plan, trade through major volatility they do not understand, or increase size after a loss.

Another common issue is changing strategies halfway through the evaluation. A trader takes one loss on a breakout, decides breakouts no longer work, then jumps into reversals. By the end of the day, there is no strategy left, only reactions.

Keep your review honest. Record the setup, entry, stop, target, size, and reason for exit. At the end of the week, ask whether losses came from valid trades that simply did not work or from broken rules. Valid losses are part of the business. Broken rules are the part you can fix.

Is a Trading Combine Right for You?

A trading combine may fit if you want access to prop-firm capital, understand that futures trading carries risk, and are willing to treat risk management as the main job. It may not fit if you need immediate income, cannot afford repeated evaluation costs, or are looking for a way to trade without developing skill.

The best time to start is not when you feel certain every trade will win. It is when you have a basic setup, a written risk plan, and the discipline to stop when your plan says stop. Trade small enough to stay in the game, review every session, and let consistency earn the next opportunity.

How to Trade Opening Range Without Blowing Your Eval

The first 30 minutes after the futures market opens can create the best opportunity of the day – and the fastest way to blow a prop-firm evaluation. Learning how to trade opening range is not about chasing the first big candle. It is about defining a tight area of price, waiting for the market to show its hand, and taking only the trade that fits your risk rules.

For traders working toward funded status, that distinction matters. You do not need to catch every point on NQ, ES, or MNQ. You need repeatable execution that protects your drawdown and gives your edge enough time to work.

What Is an Opening Range?

An opening range is the high-to-low price range created during a set period after the cash market opens. For US index futures, many traders use the 9:30 a.m. to 9:45 a.m. Eastern window or the 9:30 a.m. to 10:00 a.m. Eastern window. Once that period ends, you mark the opening-range high and opening-range low on your chart.

Those levels matter because the open brings volume, institutional positioning, overnight traders exiting, and new participation entering the market. Price may break above or below the range, but a break alone is not a trade signal. The real question is whether price can hold beyond the level with enough momentum and structure to continue.

A 15-minute range gives you earlier opportunities and typically tighter stops. A 30-minute range can filter some of the opening noise but may require a wider stop and offer fewer setups. Neither is automatically better. Pick one, test it across enough sessions, and avoid changing your time window because you missed a move.

How to Trade Opening Range Breakouts With Discipline

Start every session by marking the high and low of your chosen opening window. Then zoom out. Before you even think about an entry, identify the higher-timeframe trend, overnight high and low, prior day high and low, and major support or resistance nearby.

If the opening range forms directly beneath a major resistance level, a long breakout has less room to run. If the range breaks lower while the market is holding above strong higher-timeframe support, shorting the first red candle can be equally dangerous. Context prevents a setup from becoming a guess.

Wait for acceptance, not a wick

The most common opening-range mistake is entering the instant price pokes through a level. Markets frequently sweep an obvious high or low, trigger breakout traders, and rotate back through the range.

A stronger long setup often looks like this: price closes above the opening-range high, holds above it or retests it, then prints a higher low. For a short, price closes below the opening-range low, holds below it or retests it, then creates a lower high. You are looking for acceptance outside the range, not just a quick violation.

On fast NQ days, you may not get a perfect retest. That is where your tested entry model matters. Some traders enter on the breakout close; others require a pullback. The pullback approach may miss runaway moves, but it can reduce entries into failed breakouts. There is always a trade-off. Your job is not to build the perfect system. Your job is to execute one system consistently.

Define the stop before the entry

Your stop should sit at the point where your trade idea is clearly wrong. For a long opening-range breakout, that might be below the breakout candle low, below the retest low, or back inside the range. For a short, it may sit above the breakout candle high or the retest high.

Do not set the stop based on how much money you hope to lose. Start with the chart-based invalidation level, then adjust your position size so the dollar risk fits your account rules.

That is especially important in an evaluation. If your planned stop requires $180 of risk, but your daily plan allows $100 per trade, reduce contracts or pass on the setup. Adding size because you want to finish an evaluation faster is how a manageable red day becomes a reset.

Know where the trade can realistically go

A target should be based on structure, not excitement. The next logical destination may be the overnight high, prior day high, a major intraday swing, or a measured move equal to the opening-range size.

For example, if the 15-minute opening range on MNQ is 45 points wide and price breaks out with clean acceptance, a 45-point projected move can be a useful reference. It is not a guarantee. If major resistance sits 15 points above your entry, that level matters more than a textbook projection.

Many disciplined traders scale a portion at a defined profit level, move their stop only when their rules allow it, and let the remaining position work toward the next structure level. Others take the full position at one target. Either approach can work if it is planned before the trade, not improvised after price moves against you.

A Simple Opening Range Routine for Prop Traders

The opening range strategy becomes more effective when it is part of a routine, not a stand-alone pattern. Before 9:30 a.m. Eastern, check for high-impact economic releases and mark the major levels that could stop a breakout cold.

As the opening range develops, do nothing. Let price create the boundaries. When the window closes, write down a simple bias: bullish, bearish, or neutral. A neutral read is valid. You are not required to trade because the market opened.

After the breakout, ask three questions: Did price close outside the range? Is there room to the next key level? Can I place a stop and still stay within my predefined risk? If any answer is no, the best trade may be no trade.

At CK Trader Pro, this kind of process is the point: use your charting tools and live market education to build confidence, then let risk management make the final decision. An algorithm or indicator can help you spot trend and momentum, but it cannot protect an account if you ignore your own limits.

Risk Rules That Keep an Opening Range Strategy Alive

Opening volatility can make even a good setup expensive. Build guardrails around the strategy before you start trading it live.

Use a fixed maximum loss per trade and a firm daily loss limit. If you take two losses at the open, do not automatically keep firing entries because the next breakout “has to work.” The market does not owe you a recovery trade.

Avoid widening stops after entry. If the setup fails, take the planned loss. A small controlled loss is part of trading. A widened stop that hits a prop-firm drawdown limit is a decision, not bad luck.

Also set a maximum number of opening-range attempts. For many traders, one or two quality attempts are enough. This rule is valuable because failed breakouts can create a revenge-trading loop: long above the high, short below the low, long again inside the range. By the time the true move arrives, your daily risk is already gone.

Your exact limits depend on account size, product volatility, and the prop firm’s rules. A micro contract can be the right choice while you learn the setup. There is no prize for using more size than your execution can handle.

When Not to Trade the Opening Range

Some mornings are built for caution. Scheduled news at or shortly after the open can cause price to rip through both sides of the range. A very wide opening range may leave poor reward-to-risk. A very narrow range can create repeated fakeouts unless momentum and volume confirm the move.

Be careful when price breaks directly into a major daily level, when the market has already made an unusually large overnight move, or when you are emotionally trying to make back a prior loss. The chart can be clean while your decision-making is not.

Keep a journal with screenshots of every setup, including the ones you passed on. Track the range size, direction, entry type, stop size, target, time of day, and whether the market had room to move. After 20 to 30 sessions, you will see patterns that one exciting trade can never teach you.

The opening range is not a shortcut to a funded account. It is a structured way to let the market create levels, then decide whether the opportunity is worth your risk. Stay patient through the first burst of noise, take the setup you planned, and protect the account that gives you the chance to trade again tomorrow.

When Should Traders Stop Trading Each Day?

A futures trader can make five good decisions in a row and still lose money on the sixth trade. That is why knowing when should traders stop trading is not a small detail. For a trader working through a prop-firm evaluation or protecting a funded account, the ability to stop is often what separates a manageable red day from a blown account.

Most traders do not fail because they never saw a winning setup. They fail because they kept trading after their edge was gone, their daily plan was broken, or their emotions took control. The market will be open again tomorrow. Your job is to make sure your account is, too.

Stopping Is Part of the Trading Plan

Many new traders treat stopping as a reaction. They stop only after a large loss, a drawdown warning, or a string of impulsive trades. That is backwards. A professional-style process decides the stop point before the opening bell.

This matters even more in prop trading. Evaluation accounts give traders access to larger buying power without putting thousands of dollars of personal savings directly at market risk. But those accounts come with rules. Daily loss limits, trailing drawdowns, consistency expectations, and payout requirements all reward controlled execution, not nonstop action.

A great day is not always the day with the largest profit. Sometimes it is the day you take one clean setup, follow your risk rules, and step away. A small green day or a controlled red day can protect the opportunity to trade next week, next month, and eventually qualify for payouts.

When Should Traders Stop Trading? Six Clear Signals

There is no universal dollar amount that works for every account size, strategy, or prop-firm rule set. Still, certain stop signals apply to nearly every futures trader.

1. Your Daily Loss Limit Has Been Reached

This is the non-negotiable stop. Set a personal daily loss limit that is tighter than the maximum loss allowed by your prop firm. Your personal limit is your safety buffer, not the point where you discover whether you can recover.

For example, if an evaluation has a daily loss threshold or a trailing drawdown that could be damaged by one bad session, you may decide that two losing trades or a fixed dollar amount ends your day. Once that limit is hit, flatten positions, close the platform, and do not negotiate with yourself.

The trade-off is obvious: you might miss a later recovery. But trying to win it back while frustrated is usually not a strategy. It is a gamble with your evaluation or funded account.

2. You Have Reached Your Planned Daily Profit Goal

Traders often understand a stop-loss but ignore a stop-win. That mistake can turn a strong morning into an unnecessary giveback.

If your plan calls for one or two high-quality trades and you hit your daily target, seriously consider being done. This is especially useful for traders who tend to become aggressive after a win. Confidence is valuable. Overconfidence can lead to larger position size, looser entries, and the thought that you cannot lose.

You do not have to stop automatically every time you are green. If a clearly defined A-plus setup appears and it fits your rules, taking it may make sense. The key is that the decision must come from your plan, not from the excitement of seeing profits on the screen.

3. You Have Taken Consecutive Rule-Based Losses

Two losses do not necessarily mean your strategy is broken. Markets change character throughout the session. A setup that works in a clean trend may struggle in choppy, low-volume price action.

Create a consecutive-loss rule before you trade. For many traders, two or three valid losing attempts is enough to pause for the day. Review the screenshots later and ask a better question than, “How do I get it back?” Ask, “Were these losses executed correctly, or was the market condition wrong for my setup?”

A valid loss is part of trading. Repeating the same attempt in conditions that are no longer favorable is how a normal loss becomes account damage.

4. You Feel the Need to Make Money Back Immediately

Revenge trading is usually easy to recognize after the fact. You increase size after a loss. You enter before your confirmation. You take a trade you would never show your coach or trading group. You tell yourself one big move will fix the day.

That is your stop signal.

The fastest way to reduce emotional trading is to build friction into the process. Walk away from the desk for 10 minutes. Write down the entry you wanted to take and the exact reason you wanted it. If the reason is anger, fear of missing out, or the need to recover, the trade does not qualify.

No prop-firm account is worth forcing a setup. The market does not owe you a recovery trade.

5. The Market Is Not Giving Your Setup

A trader with a trend-continuation strategy should not force trades during random sideways action. A trader who relies on opening volatility may have no business clicking buttons at noon just because they are still sitting at the screen.

Define the market conditions your strategy needs: trend, range, key levels, volume, session timing, or confirmation from your charting tools. If those conditions are absent, stopping is the correct trade.

This can feel uncomfortable because no trade means no immediate opportunity. But waiting protects capital and confidence. One clean setup is worth more than five low-quality entries taken out of boredom.

6. You Are Trading Through a High-Impact Event Without a Plan

Economic releases, Federal Reserve announcements, and unexpected headlines can create fast movement and wide swings in futures markets. Some experienced traders build specific rules for these windows. Others avoid them completely.

What matters is choosing your approach in advance. Do not hold a position into major news simply because you hope volatility will rescue a bad entry. If you do trade news, reduce size, know the risk, and use a tested process. If you do not have that process, stop trading until the initial volatility settles.

Build a Personal Stop-Trading Framework

The best stop rule is specific enough to follow when emotions are high. “I will be disciplined” sounds good, but it does not tell you what to do after a loss or a big win.

Before each session, write down these five boundaries:

  • Your maximum daily loss, set below the account’s allowed loss threshold.
  • Your maximum number of trades or losing trades.
  • Your daily profit target and whether you will stop once it is reached.
  • The times of day you are allowed to trade.
  • The market conditions that qualify as an A-plus setup for your system.

Keep these limits visible while you trade. The goal is not to make your process rigid for the sake of it. The goal is to remove decisions that become difficult when your P&L is moving quickly.

If you use TradingView-based indicators or an Automated Trade Assistant, treat them as tools that support your plan, not permission to override it. Technology can help identify levels, manage execution, and create consistency. It cannot protect a trader who refuses to stop.

A Stop Is Not Quitting

There is a major difference between quitting because trading is hard and stopping because your rules tell you to stop. One is avoidance. The other is discipline.

The traders who build staying power learn to respect boring, repeatable habits. They protect drawdown on bad days. They avoid giving back solid gains. They collect data instead of chasing redemption. Over time, that behavior makes it easier to pass evaluations and manage funded accounts with less stress.

At CK Trader Pro, the focus is not on being in a trade all day. It is on helping traders build a process they can repeat when the market is moving and when emotions are loud. Your best opportunity is not every candle. It is the setup that matches your plan and your risk.

What to Do After You Stop

Stopping the day should not mean carrying the result emotionally into tomorrow. Take a few minutes to record the session. Save chart screenshots, note the setup, record your entry and exit, and grade whether you followed the plan.

If you stopped after a loss, do not immediately search for someone else’s trade idea or open a simulator to force a recovery. First determine whether the loss came from execution, market conditions, or a rule violation. That distinction tells you what to improve.

If you stopped after a win, review that too. Did you execute a planned setup, manage risk properly, and avoid overtrading? A green day only builds confidence if you understand why it worked.

Tomorrow, you do not need to prove anything to the market. Show up with your levels marked, your risk defined, and the discipline to stop when your plan says the day is over.

TradingView Pine Script Guide for Futures Traders

Most traders do not fail a prop-firm evaluation because they cannot find an indicator. They fail because they take too many signals, size up after a loss, and trade without a defined process. This TradingView Pine Script guide shows you how to use custom scripts to create clearer rules, test ideas, and support disciplined futures execution.

Pine Script is TradingView’s built-in coding language. It lets you turn a chart idea into an indicator, alert, or backtestable strategy. You do not need to become a software engineer to benefit from it. You need to know how to translate a simple trading rule into something your chart can display consistently.

For prop traders, that consistency matters. Your script should help you protect drawdown, avoid random entries, and trade your best setup – not convince you to take more trades.

What Pine Script Can Do for a Futures Trader

A Pine Script indicator can calculate moving averages, identify opening ranges, plot session highs and lows, flag trend changes, and create alerts when your conditions line up. A strategy can go one step further by simulating entries and exits on historical data.

That sounds powerful because it is. But it is not a shortcut around execution. A script cannot stop you from moving a stop, trading during choppy conditions, or firing back after a loss. Think of it as a rules assistant. It can make your process visible, repeatable, and easier to review.

For example, an ES or NQ trader may only want long entries when price is above a 20-period and 50-period moving average, then pulls back to the faster average during regular market hours. That is a clear starting framework. Pine Script can show when those conditions occur, which removes some of the guesswork from staring at candles.

The best scripts answer a narrow question: What market condition am I trying to identify? Trying to build an all-in-one system on day one usually produces a cluttered chart and a trader who trusts nothing on it.

TradingView Pine Script Guide: Start With an Indicator

Open a TradingView chart and select Pine Editor from the lower panel. Start with an indicator before you build a fully automated-looking strategy. An indicator lets you see your logic on live and historical price action without pretending every signal is tradable.

Here is a simple trend filter written in Pine Script:

“`pine //@version=6 indicator(“Simple Trend Filter”, overlay=true)

fastLength = input.int(20, “Fast EMA Length”) slowLength = input.int(50, “Slow EMA Length”)

fastEMA = ta.ema(close, fastLength) slowEMA = ta.ema(close, slowLength)

bullTrend = fastEMA > slowEMA bearTrend = fastEMA < slowEMA

plot(fastEMA, color=color.blue, linewidth=2) plot(slowEMA, color=color.orange, linewidth=2)

bgcolor(bullTrend ? color.new(color.green, 90) : bearTrend ? color.new(color.red, 90) : na) “`

Paste the code into Pine Editor and click Add to Chart. You will see two exponential moving averages and a light background that identifies whether the fast EMA is above or below the slow EMA.

This script does not tell you to buy or sell. That is intentional. Its job is to keep you on the right side of the market condition. If your plan says you only take longs in bullish conditions and shorts in bearish conditions, the chart now gives you a fast visual filter.

Do not add five more indicators just because you can. A clean chart with one trend filter, a key level, and your price-action confirmation is often more useful than a dashboard full of conflicting colors.

Learn the Building Blocks

Most beginner scripts use a small set of concepts. `input` creates settings you can adjust from the chart. `ta` refers to TradingView’s technical analysis functions, such as moving averages and RSI. `plot` draws values on your chart. A condition such as `close > fastEMA` returns true or false.

That true-or-false logic is the foundation of a trading script. You build conditions, combine them, and decide what should happen when they are met. The goal is not complicated code. The goal is code that matches a trading rule you can explain in one sentence.

Turn a Setup Into a Testable Strategy

Once an indicator helps you see your setup, you can test a version of it as a strategy. Strategies use `strategy()` instead of `indicator()` and can simulate orders in TradingView’s Strategy Tester.

Here is a basic crossover example:

“`pine //@version=6 strategy(“EMA Crossover Test”, overlay=true, pyramiding=0)

fastEMA = ta.ema(close, 20) slowEMA = ta.ema(close, 50)

longCondition = ta.crossover(fastEMA, slowEMA) shortCondition = ta.crossunder(fastEMA, slowEMA)

if longCondition strategy.entry(“Long”, strategy.long)

if shortCondition strategy.entry(“Short”, strategy.short)

plot(fastEMA, color=color.blue) plot(slowEMA, color=color.orange) “`

This is a learning tool, not a ready-made futures system. A moving-average crossover can work in a strong trend and get chopped up badly during range-bound sessions. That is the point of testing: you find out where an idea breaks before you risk an evaluation account.

Use the Strategy Tester to review net profit, drawdown, win rate, average trade, and the number of trades. Do not worship win rate. A system with a 75% win rate can still lose money if its losses are much larger than its winners. A system with a lower win rate can be viable if risk and reward are controlled.

For prop trading, maximum drawdown and losing streaks deserve special attention. If a backtest shows a string of losses that would put you near your evaluation’s drawdown limit, the strategy may not fit your account rules even if the total historical result looks attractive.

Build Rules Around the Market You Actually Trade

Futures markets have different personalities. NQ can move quickly and punish wide stops. ES may offer cleaner rotations but still demands patience. Crude oil, gold, and the micro contracts each bring their own volatility and liquidity behavior.

Your script needs inputs that reflect your market and timeframe. A five-minute NQ setup should not automatically be copied onto a one-minute chart or applied to ES without review. Test the same concept across enough sessions to see how it behaves during trend days, range days, news-driven moves, and low-volume periods.

Time filters are especially useful for day traders. You may find that your setup performs best during the opening hour and becomes unreliable around lunch. Pine Script can limit signal generation to a defined session, but you still need to decide whether the logic makes sense for your plan.

Keep your core risk rules outside the script as well. Set a daily loss limit, define your maximum number of trades, and decide your contract size before the session begins. Evaluation rules can change by firm and account type, so confirm the current requirements in your own account dashboard before trading.

Avoid the Backtesting Traps That Blow Accounts

Backtests can make almost any idea look impressive if you over-optimize it. Changing an EMA from 20 to 21 because it improved a historical result is not necessarily refinement. It may be curve fitting – tuning the system to old data that will not repeat.

Use a larger sample. Review different market conditions. Leave some historical data untouched until the end, then check whether your rules still hold up. Include realistic commissions and slippage where possible, especially on faster products and shorter timeframes.

Also watch for repainting. Some scripts appear perfect because they use future information or higher-timeframe data incorrectly. A signal that changes after a candle closes is not a signal you could have acted on in real time. For a cleaner process, base decisions on confirmed bars and watch your script in replay mode before trusting its alerts.

The trade-off is simple: more filters may improve historical accuracy but reduce the number of opportunities. Fewer filters may give you more trades but more noise. Your job is to find rules that are simple enough to execute under pressure and selective enough to protect your account.

Use Alerts to Support Execution, Not Replace It

TradingView alerts can notify you when your conditions are met. That can be valuable if you trade a defined opening-range break, pullback, or trend continuation setup. It keeps you from staring at every tick and helps you focus only when the market reaches your area of interest.

An alert is not a command to enter. When it fires, check the context: Is price at a meaningful level? Is the market trending or rotating? Is there major scheduled news ahead? Does the trade fit your remaining daily risk?

That final decision is where professional habits are built. At CK Trader Pro, the focus is not on collecting signals. It is on building a repeatable process that can help you pass evaluations, protect funded accounts, and give yourself a real chance to earn payouts.

Start with one setup, one market, and one clear rule this week. Put it on the chart, replay it, journal what you see, and let your data earn the right to influence your next trade.

How to Plan Trade Entries Without Chasing

A futures trade can look perfect after it runs. Before it runs, it is just a decision point with risk attached. That is why learning how to plan trade entries matters more than finding another indicator or trying to predict every tick. Your entry plan is where your chart idea becomes a controlled trade instead of an emotional click.

For prop firm traders, this is not a small detail. A rushed entry can force a larger stop, create an unnecessary drawdown hit, and turn one bad impulse into a failed evaluation day. The goal is not to catch every move. The goal is to take the trades that fit your setup, your risk limits, and your account rules.

How to Plan Trade Entries Before the Market Opens

A strong entry starts well before price reaches your level. If you wait until a candle starts moving fast to decide what you want to do, you are reacting. You may still get a winner, but you are not building repeatable execution.

Start by marking the areas where the market is likely to make a decision. For futures traders, that can include the prior day high and low, overnight high and low, major session opens, obvious support and resistance, and zones where price previously rejected or consolidated. These are not magic lines. They are reference points that help you identify where buyers and sellers may respond.

Then build a simple market thesis. Is price trending higher, trending lower, or rotating inside a range? A long setup makes more sense when the market is holding higher lows and reclaiming key levels. A short setup makes more sense when rallies are failing beneath resistance and lower highs are forming. In a choppy range, either reduce expectations or stay patient until price reaches the edges.

Your plan should answer three questions before the opening bell:

  1. Where would I consider a long?
  2. Where would I consider a short?
  3. What price action would tell me to do nothing?

That third question protects accounts. Many traders can identify a level. Fewer traders can sit on their hands when price is stuck in the middle of nowhere. The middle of a range is where entries often become guesses and stops get chewed up.

Define the Setup, Not Just the Price

“Buy at support” is not an entry plan. It is a vague idea. Support can break, price can chop around it, and a fast news-driven move can move straight through it. A usable plan defines the condition that must occur at your level.

For example, you may plan a long only if price pulls back into a marked support zone, holds above it, and then reclaims a nearby intraday level with momentum. Or you may plan a short if price tests a prior high, rejects it, and breaks the low of the rejection candle.

The exact pattern matters less than consistency. You need to know what your setup looks like before money is on the line. If you use TradingView tools, price alerts, or a rules-based algorithm, use them to bring attention to your area of interest. Do not treat any signal as permission to enter without context.

A quality entry plan has four parts: location, confirmation, invalidation, and target. Location tells you where the trade may happen. Confirmation tells you what needs to happen before you enter. Invalidation tells you where the idea is wrong. The target tells you whether the reward justifies the risk.

If one of those pieces is missing, you are not fully planning the trade. You are hoping to solve the hard part after you are already in.

Choose the Entry Style That Fits the Market

There is no single best entry style. It depends on market conditions, your experience, and the distance to your invalidation point.

A limit entry can offer a better price at a planned level, but it comes with the risk that price keeps moving against you without confirming the setup. A stop entry can get you into a breakout or reversal after confirmation, but you may pay up for the move and get caught in a false break. A market entry is useful when your planned confirmation has occurred and execution speed matters, but it should never mean jumping in because you are afraid of missing out.

Newer traders often think precision means entering at the exact high or low. It does not. Precision means entering according to your rules with a stop that makes sense. Missing the first few points of a move is better than entering too early, widening your stop, and turning a planned trade into a rescue mission.

Put Risk Before the Order Ticket

Your entry, stop, and position size must work together. You cannot decide to risk $100, place a wide stop, and then trade the same size you use on a tight setup. That is how traders violate daily loss limits without realizing it until the damage is done.

First, choose the dollar amount you are willing to lose if the setup fails. For a prop firm evaluation, that amount should be small enough that several normal losses do not threaten your daily loss limit or trailing drawdown. Next, place your stop where the trade idea is invalidated, not where the dollar number feels more comfortable. Finally, calculate how many contracts fit between that stop distance and your preset risk.

If the proper position size is smaller than you want, that is information. Either trade smaller, use a micro contract, wait for a cleaner setup with a tighter invalidation, or skip the trade. Do not force a full-size position into a setup that cannot support it.

This is one reason micro futures are valuable for developing traders. They allow you to practice real execution, respect stops, and build confidence without making every tick feel like an emergency. The objective is to prove your process before increasing size.

Make the Stop Part of the Plan

A stop loss is not an admission that you were wrong as a trader. It is the cost of testing an idea in a market that can do anything. The real mistake is moving a stop farther away because you do not want to take the loss.

Place the stop at a technical point that invalidates your setup. On a long, that might be below the low that should hold if buyers are in control. On a short, it might be above the rejection high or resistance zone that should cap price. Give the trade enough room for normal movement, but not so much room that one trade takes a meaningful chunk out of your account.

Once the order is live, your job is to follow the plan. A controlled loss is progress when it keeps you inside your rules and ready for the next clean opportunity.

Use a Pre-Entry Checklist to Kill Impulse Trades

Fast markets create pressure. A short checklist slows your decision down just enough to protect you from random entries. Before clicking buy or sell, ask yourself:

  • Is price at one of my preplanned areas?
  • Is the market context supporting this direction?
  • Did my required confirmation occur?
  • Is my stop placed at true invalidation?
  • Does the position size fit my dollar risk?
  • Is there enough room to my target for the trade to make sense?
  • Am I entering because of my setup, or because I feel late?

If you cannot answer those questions clearly, pass. You do not need to trade every session to become profitable. In fact, traders who pass evaluations and protect funded accounts usually become more selective, not more active.

Manage the Trade Without Rewriting the Rules

Planning the entry does not end once you are filled. You should also know what will happen if price moves in your favor, stalls, or immediately fails.

Decide ahead of time whether you will take partial profits, move your stop to breakeven, trail behind structure, or hold for a fixed target. There are trade-offs. Moving to breakeven too quickly can protect capital but may cut you out of good trades during normal pullbacks. Holding every trade for a large target can produce bigger wins, but it can also turn a solid gain into a scratch or loss. Review your own data to find what fits your setup.

Avoid managing a trade based on the profit and loss number alone. If you find yourself staring at dollars instead of price structure, reduce size. Smaller size gives you room to execute the plan instead of reacting to every fluctuation.

Review Entries Like a Professional

The fastest way to improve entries is to review them after the session, not to endlessly change strategies. Save a screenshot of the chart before and after each trade. Write down the level, setup, entry trigger, stop location, target, and result. Most importantly, label whether you followed your rules.

A losing trade with clean execution can be a good trade. A winning trade taken outside your plan can be a dangerous trade because it rewards bad behavior. Over time, this review will show whether your issue is level selection, waiting for confirmation, stop placement, sizing, or trade management.

At CK Trader Pro, the focus is on turning that review into accountability and repeatable routines, not chasing one lucky day. You are building a skill that needs to survive red days, evaluation pressure, and the temptation to make it all back in one trade.

The next time price starts moving without you, let it go if it did not meet your plan. Another setup will come. Protecting your capital and executing one clean entry is always a stronger move than chasing a chart and hoping this time is different.

Why Do Traders Revenge Trade After a Loss?

A red trade is supposed to be information. Instead, for many futures traders, it becomes a personal challenge. That is why do traders revenge trade after a loss: they stop responding to the market and start trying to erase a feeling.

The setup may still look clean. The account may still have room. But the mindset has changed. A trader who normally waits for confirmation suddenly enters early, adds size, skips a stop, or takes the next trade simply because price moved without them. On a prop-firm evaluation, that shift can turn one normal loss into a blown account fast.

Revenge trading is not proof that you are incapable of trading. It is proof that your process was not strong enough to hold up under pressure. The good news is that discipline can be trained, measured, and repeated.

Why Do Traders Revenge Trade?

Revenge trading usually begins when a trader believes the last loss should not have happened. Maybe the market stopped them out before moving in their original direction. Maybe they missed a runner by one tick. Maybe they broke a rule and now feel embarrassed or frustrated.

The mind wants resolution. It wants the P&L back to even right now, not after the next five high-quality setups. That urgency is the problem. Markets do not owe anyone a recovery trade, and a prop account does not care whether a loss felt unfair.

For many traders, revenge trading comes from four pressures happening at once:

  • Loss aversion: A loss feels more painful than an equal win feels satisfying, so the trader tries to remove the pain immediately.
  • Ego and the need to be right: Being wrong on a trade can feel like being wrong as a trader, even though losses are part of every legitimate strategy.
  • Fear of missing out: After a stop-out, price may run. The trader jumps back in late, often at the worst possible location.
  • Account pressure: Evaluation deadlines, drawdown limits, bills, or a desire for a payout can make one trade feel far more important than it is.

None of these pressures improve your edge. They only make you more likely to increase risk when your decision-making is weakest.

The Prop-Firm Problem: Small Mistakes Compound

In a personal brokerage account, revenge trading can drain capital over time. In a prop-firm evaluation or funded account, the consequences can arrive much faster because drawdown rules create a hard boundary.

A trader takes a planned loss on NQ, then doubles contracts to make it back. The next entry is late. The stop is widened because they do not want another red trade. Now a controlled loss becomes a major hit to the trailing threshold. The trader feels even more pressure, so they trade again. That cycle is how a good evaluation gets damaged in 20 minutes.

The issue is not that prop rules are unfair. The issue is that they demand professional risk behavior before they reward you with access to larger buying power. That is the deal. You are not trying to hit a home run on one session. You are proving you can protect capital long enough for your edge to play out.

This is also why account size should not dictate your position size. Just because an account allows more contracts does not mean your strategy, experience level, or drawdown can support them. Trade the size your process can manage calmly.

What Revenge Trading Looks Like on the Chart

Revenge trading is not always obvious. It does not always mean slamming the buy button with 10 contracts. Sometimes it looks respectable from the outside.

It can be re-entering the same failed setup three times without a new reason. It can be taking a B-grade trade after your A-grade setup lost. It can be moving a stop just enough to avoid taking the planned loss. It can also be switching from a defined opening-range or trend setup to random countertrend entries because the market did not behave as expected.

The common thread is this: the trade is driven by what already happened, not by what your plan says is happening now.

A clean re-entry is different. If price stops you out, reclaims a key level, confirms with volume and structure, and your plan specifically allows a second entry, taking it may be valid. The difference is evidence. A planned re-entry has predefined conditions and predefined risk. A revenge entry has emotional urgency.

Build a Reset Rule Before You Need One

You cannot rely on willpower after a frustrating loss. Your reset process has to be decided before the market opens.

Start with a daily loss limit that sits well inside your prop firm’s maximum drawdown. This is your personal stop, not the absolute amount the account will let you lose. If your account technically has room for more damage, that is not permission to use it.

Then create a simple response for losing trades. After one planned loss, step back and label it: valid setup, execution mistake, or emotional trade. If it was valid, there is nothing to fix. If it was an execution mistake, write the correction before taking another trade. If it was emotional, your next decision should be to pause, not to recover.

For traders who know they become reactive, a two-loss rule is powerful. Two losing trades, or one rule-breaking trade, means you are done for the session. This can feel restrictive when the market later gives a great move. But protecting your decision quality matters more than catching every move. There will be another session.

Use Smaller Size to Rebuild Trust

When a trader is in a revenge cycle, the instinct is to trade bigger. The practical answer is the opposite.

Reduce to one micro contract or the smallest size that lets you execute your system with real attention. This is not a punishment. It is a way to separate your skill from your emotional attachment to the dollar amount. If you cannot follow your rules at small size, increasing size will not solve the issue.

Small size also gives you room to collect data. You can see whether your TradingView levels, trend criteria, entry triggers, and risk targets are actually producing the outcomes you expect. Without clean data, every loss feels random. With clean data, you can tell the difference between a normal losing streak and a broken process.

At CK Trader Pro, the goal is not to create traders who need a perfect market day. It is to help traders build repeatable habits that can support evaluations, funded accounts, and eventually payouts. Consistency starts with the trades you choose not to force.

A Five-Minute Post-Loss Routine

The fastest way to interrupt revenge trading is to put time between the loss and the next click. After any trade that triggers anger, panic, or urgency, do this before opening another position:

  1. Step away from the order entry screen for five minutes. Stand up, get water, and let the immediate physical reaction settle.
  2. Screenshot the chart and mark your entry, stop, target, and the reason you took the trade.
  3. Ask one question: Would I take this exact trade again if the P&L were hidden? If yes, it may have been a good process loss. If no, identify the broken rule.
  4. Check whether a new setup is truly present. Not whether price is moving, but whether your exact setup is present.
  5. Return only with your normal size and your normal stop. If you feel the need to size up, you are not ready to trade.

This routine will not remove emotion from trading. No serious trader is emotionless. It gives you a structure that prevents emotion from placing orders.

Stop Measuring Your Day by One Trade

A trader who judges the day by one loss will always be vulnerable to revenge. A trader who judges the day by rule adherence has a chance to grow.

Track a few numbers after each session: how many trades matched your plan, whether you respected your daily loss limit, whether you changed size emotionally, and whether you stopped when your rules required it. P&L still matters, especially in prop trading, but it is a lagging result. Process is the part you control.

There will be days when following the rules still produces a red number. That does not mean the day was a failure. A controlled red day preserves the account, protects your confidence, and keeps you available for the next quality opportunity.

The next time a loss makes you want to win it back immediately, treat that feeling as a signal, not an instruction. Step back, protect the account, and earn the right to trade the next setup with a clear mind.

Understanding Futures Margin Requirements

Margin is not the amount you can afford to lose on a trade. That misunderstanding is one reason traders enter a futures position feeling safe, then watch a normal pullback put their account or evaluation at risk. The cash required to open a contract and the capital needed to survive its movement are two very different numbers.

Understanding futures margin requirements gives you a clearer view of both. For traders pursuing prop firm evaluations, that clarity matters even more because the real constraint is usually not buying power. It is the drawdown rule. Your job is not to use every dollar of available leverage. Your job is to protect the account long enough to execute your edge consistently.

What futures margin actually means

In futures trading, margin is a good-faith deposit required to hold a position. You are not paying the full notional value of the contract. Instead, your broker or prop firm requires a fraction of that value as collateral.

That leverage is one reason futures can be attractive. A trader can access meaningful market exposure without putting up the full value of an index, commodity, currency, or other futures contract. But leverage works both ways. A small move in price can create a meaningful profit or loss quickly, especially when trading multiple contracts.

For retail traders, the phrase “margin requirement” can refer to several different rules. If you do not separate them, position sizing becomes guesswork.

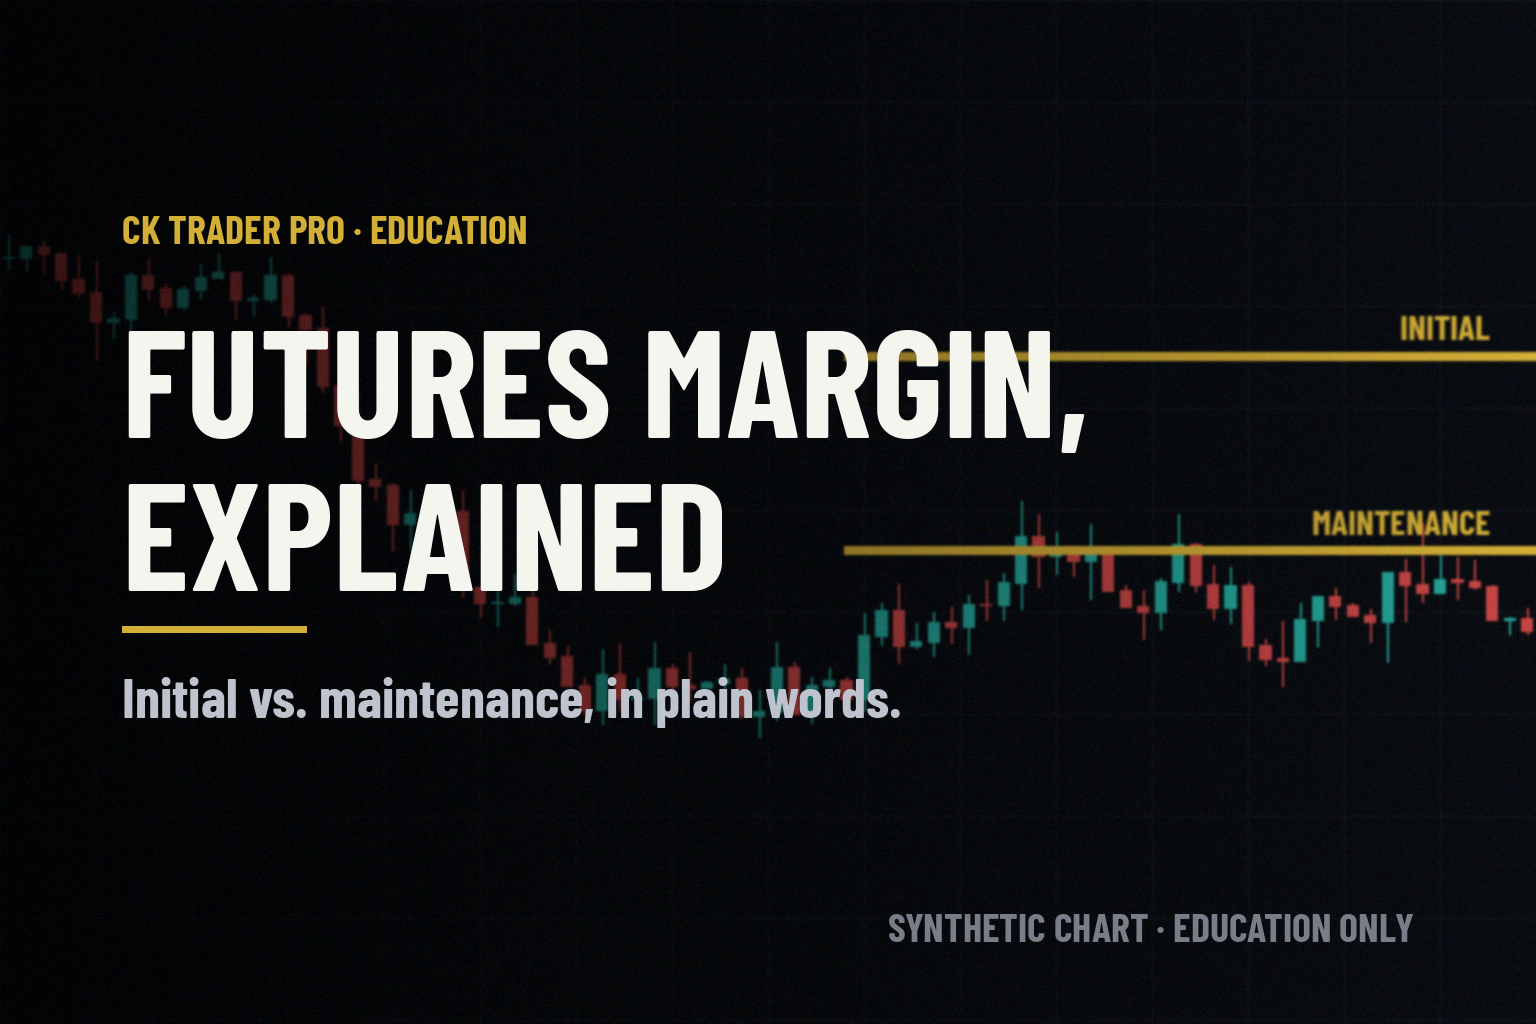
Initial margin and maintenance margin

Exchange-set initial margin is generally the amount required to open and carry a futures position. Maintenance margin is the minimum amount that must remain in the account to keep that position open. If the account falls below the maintenance level, additional funds may be required or the position may be liquidated, depending on the broker’s policies.

These requirements are designed for risk management at the clearing and brokerage level. They can change as market volatility changes. When markets get fast, exchanges may raise margin requirements because the risk of larger price swings rises.

For many day traders, however, the number they see most often is the broker’s intraday margin. This is usually lower than the amount needed to hold a position overnight. It is useful for active traders, but it should never be mistaken for a recommended trade size.

Intraday margin is access, not a risk plan

A broker might allow a relatively small intraday deposit to control one futures contract. That does not mean one contract is appropriate for every account, every evaluation, or every setup.

Think about it this way: intraday margin tells you what the platform may let you open. Your stop loss, contract value, daily loss limit, and drawdown rule tell you what you should open. Professional execution starts with the second set of numbers.

If one contract risks more than your planned loss on a trade, the answer is not to widen the stop and hope. The answer may be to trade a micro contract, wait for a tighter setup, or skip the trade entirely.

Futures margin requirements vs. prop firm drawdown

This is where many evaluation accounts get blown. A trader sees available buying power, enters too large, and assumes there is room for the trade to work. But prop firm rules are often built around a maximum loss threshold, trailing drawdown, daily loss limit, or a combination of those controls.

Those rules are separate from exchange margin. You may have enough buying power to open several contracts while still having very little room before violating a drawdown rule.

For example, imagine a trader has an evaluation account with a $2,500 trailing drawdown. The platform may permit multiple contracts, but that does not make multiple contracts a smart choice. If the trader risks $500 on one setup, then takes a second $500 loss, the account is already under serious pressure. Add slippage, a missed stop, or an emotional revenge trade, and the evaluation can disappear in one session.

The smarter question is not, “How many contracts can I trade?” Ask, “How much of my drawdown am I willing to risk on one idea?”

For newer traders, a small fixed dollar risk per trade creates breathing room. That room gives you the ability to take the next qualified setup instead of trading scared after one loss. It also gives your strategy a real chance to play out over a meaningful sample of trades.

Calculate risk before you enter

Futures contracts move in ticks and points, and each contract has a defined dollar value per tick. Before placing an order, you need to know three numbers: where your stop goes, how many ticks sit between entry and stop, and what each tick is worth for the contract you are trading.

The basic calculation is simple:

Risk per trade = stop size in ticks × dollar value per tick × number of contracts

Suppose your setup requires a 12-tick stop. If the contract moves $5 per tick, one contract risks $60 before commissions and slippage. Two contracts risk $120. The math is not complicated, but skipping it creates expensive surprises.

Micro contracts can be a powerful tool here. They allow traders to participate in the same market with smaller tick values than standard contracts. That can make it easier to place a logical stop behind market structure while keeping the actual dollar risk within your plan.

A smaller contract is not a sign that you are thinking small. It is a sign that you are protecting your ability to trade tomorrow. Many traders rush to size up because they want faster results. The traders who last understand that consistency earns the right to increase size.

Build a margin-aware trading plan

A strong futures plan connects position size to risk, not excitement. Before the session begins, decide your maximum loss for the day and your maximum risk on a single trade. Then choose the contract size that fits those limits.

Your daily loss limit should leave room for normal losing streaks without inviting impulsive recovery trades. If you hit that number, the trading day is done. No exceptions because you “feel” the next setup is perfect.

Your per-trade risk should also fit the type of setup you trade. A quick scalp with a tight, clearly defined invalidation point may call for one approach. A trade based on a wider support or resistance zone may require a larger stop and therefore smaller size. The stop should be based on the chart, not on the dollar amount you hope to make.

There is a trade-off. Using smaller size may mean slower progress toward a profit target. But oversized positions can turn one ordinary red trade into a rule violation. In an evaluation, surviving and executing cleanly is more valuable than forcing a big day.

Account size does not automatically justify bigger size

Larger prop accounts can create a false sense of security. A bigger headline balance may come with more contracts available, but the drawdown rule still determines the practical risk budget. Read the current rules for the specific program you choose, including whether drawdown trails, when it stops trailing, how daily loss is calculated, and whether unrealized losses count.

Do not rely on screenshots, old videos, or another trader’s interpretation. Firms can update terms, and details matter. Treat the rulebook like part of your trading system.

Avoid the margin mistakes that end evaluations

The first mistake is confusing buying power with permission to take risk. The second is holding a losing trade because the margin requirement makes the position seem inexpensive. A low entry requirement does not reduce the contract’s dollar movement.

Another common mistake is adding contracts to a loser. Averaging down can make the average entry look better while quietly multiplying the exposure. If the original trade idea is invalidated, more size does not fix the setup. It only makes the loss arrive faster.

Traders also get caught by holding positions too close to the end of the session. Intraday margin may no longer apply if you hold past the broker’s cutoff time, and required margin can rise sharply for overnight positions. Know your platform’s schedule and close positions according to your plan, not at the last second.

Finally, do not ignore volatility. News releases, market opens, and sudden directional moves can produce slippage. Your stop is essential, but it is not always a guarantee of an exact fill in a fast market. Leave room in your risk plan for imperfect execution.

Turn margin knowledge into discipline

Margin is a tool. It gives you access to leverage, but it does not create an edge, protect a drawdown, or make a trade high probability. Your process does that.

At CK Trader Pro, the focus is on pairing chart-based setups with rules that protect the account. That means knowing your levels, setting risk before entry, using the right contract size, and staying accountable when the market does not cooperate. The goal is not to win every trade. It is to build the kind of repeatable execution that can pass an evaluation and support long-term funded trading.

Before your next session, write down the exact dollar amount you are willing to lose per trade, then calculate the contract size that fits it. That one habit can turn futures margin from a source of confusion into a guardrail for better decisions.

Protected: Hacked by CoupDeGrace


Protected: Hacked by CoupDeGrace


How to Read Supply & Demand Zones Like a Floor Trader: CK’s Clean Charting Method for Passing Your Prop Firm Evaluation

Most traders do not fail a prop firm evaluation because they cannot find a trade. They fail because they take too many trades, trade through market noise, or risk too much on setups that were never high quality to begin with.

CK’s clean charting method solves the first problem: clarity.

Instead of covering your TradingView screen with indicators, trendlines, and conflicting signals, we focus on three things:

  1. The macro and micro trend
  2. High-quality supply and demand zones
  3. Defined risk before the order is placed

This approach is designed to help traders pursue prop firm capital with discipline: not gamble their personal savings. In some promotional periods, traders may be able to begin an evaluation for as little as $20 instead of risking $2,500 or more of their own money. However, the evaluation fee is not your total risk. You still need a strategy, emotional control, and a complete understanding of the firm’s current rules.

At CK Trading Institute, we teach traders how to leverage structured analysis, live education, and AI-powered tools such as the Automated Trade Assistant (ATA) to pursue mastery one clean setup at a time.

“Passed the 50k eval in 9 days. Only risked $20 of my own money. This is a game changer.” : Sarah L., CK community member

“I used to blow accounts every week, but the drawdown management tool in the algorithm literally saved me.” : Marcus T., CK community member

WHAT SUPPLY AND DEMAND ZONES REALLY MEAN

A demand zone is an area where aggressive buying previously entered the market. Price moved away from that area with enough strength to break a prior swing high or change the short-term structure.

A supply zone is the opposite. It is an area where aggressive selling entered the market, pushing price lower and breaking a prior swing low.

Think of these zones as locations where the market previously showed clear imbalance between buyers and sellers.

The key is not simply finding a green or red rectangle. A valid zone should explain a significant move.

  • Demand is generally found below current price.
  • Supply is generally found above current price.
  • The strongest zones usually form after a brief consolidation.
  • The move away should be fast and decisive.
  • The move should break meaningful market structure.
  • The first retest is often more valuable than repeated retests.

The objective is to stop trading in the middle of nowhere. We want to wait for price to return to an area where the market has already demonstrated its intent.

Candlestick chart representing price movement, momentum, and trading precision

CK’S CLEAN CHARTING METHOD: FIVE STEPS

1. START WITH THE MACRO TREND

Before searching for an entry, zoom out.

Use a higher timeframe: such as the 1-hour or 4-hour chart: to determine whether the market is broadly trending higher, trending lower, or moving sideways. Then use an intraday timeframe, such as the 5-minute or 15-minute chart, to refine the setup.

When the macro trend is bullish, we prioritize demand zones and long opportunities. When the macro trend is bearish, we prioritize supply zones and short opportunities.

This does not mean countertrend trades are impossible. It means they require stronger proof and should generally be approached with less risk.

A common evaluation mistake is buying every small demand zone during a major downtrend or shorting every supply zone during a major rally. Clean charting begins with context. Establish the dominant direction before you focus on execution.

Action: Mark the higher-timeframe trend before the market opens. Do not allow a one-minute candle to determine your entire trading bias.

2. FIND THE BASE THAT CAUSED THE IMPULSE

Look left on the chart for a powerful move.

For a demand zone, identify the last bearish candle or small group of candles before price rallied aggressively. For a supply zone, identify the last bullish candle or small group of candles before price sold off sharply.

That small consolidation is the base.

A clean base usually has:

  • Tight candles
  • Limited overlap
  • A short period of sideways movement
  • A strong, impulsive departure
  • A clear break of structure

Avoid zones created by slow, overlapping price action. If price drifted away without conviction, the zone may not represent meaningful order flow.

Draw the demand zone from the lower extreme of the base to the upper edge of the consolidation. For supply, draw from the upper extreme down to the lower edge of the base. Extend the rectangle to the right so you can monitor the retest.

Action: Keep only zones that caused a meaningful structural move. Delete zones that merely produced a minor bounce.

3. REQUIRE A BREAK OF STRUCTURE

A zone is stronger when it produces a measurable change in market structure.

For demand, price should close above a previous swing high. For supply, price should close below a previous swing low.

This filter removes a large amount of chart clutter. Without a structural break, you may simply be marking random pauses in price.

You can also look for additional confirmation:

  • A liquidity sweep below a prior low before a demand move
  • A liquidity sweep above a prior high before a supply move
  • A visible imbalance or fair value gap
  • Large momentum candles leaving the base
  • Alignment with a higher-timeframe zone

These features do not guarantee a winning trade. They improve the quality of the decision-making process by requiring evidence that buyers or sellers actually took control.

Action: Do not label a zone “high probability” until price proves that it displaced the opposing side.

4. WAIT FOR THE FIRST CLEAN RETEST

The first return to a fresh zone is often the most important test.

When price revisits demand, buyers may defend the area again. When price revisits supply, sellers may defend it again. Each subsequent test can consume resting orders and weaken the zone.

You have two primary entry styles:

Limit entry: Place an order near the edge of the zone before price arrives. This offers a better price but provides less confirmation.

Confirmation entry: Wait for a rejection wick, engulfing candle, or lower-timeframe structure shift inside the zone. This may produce a later entry, but it can reduce the chance of entering during a failed reaction.

For prop firm evaluations, confirmation entries are often easier for newer traders to execute because they force patience. The trade does not begin simply because price touched a rectangle. Price must show that the zone is working.

Action: Choose one entry model and apply it consistently. Do not switch between limit and confirmation entries based on fear or excitement.

5. DEFINE THE TRADE BEFORE YOU ENTER

Your stop-loss belongs beyond the zone: not at an arbitrary distance that makes the position look more comfortable.

For a long trade, the stop generally belongs below demand. For a short trade, it generally belongs above supply. The exact distance must account for volatility, the instrument, and the size of the zone.

Your target should be logical. The next opposing zone, recent swing high, or recent swing low can provide a reasonable objective.

Before entering, calculate:

  • Entry price
  • Stop-loss price
  • Dollar risk
  • Number of contracts
  • Profit target
  • Maximum daily loss
  • What would invalidate the setup

If you cannot define these items, you do not have a complete trade plan.

HOW TO APPLY SUPPLY AND DEMAND TO A PROP FIRM EVALUATION

Passing an evaluation is not about making the largest possible profit in the shortest period. It is about reaching the target while protecting the account from drawdown violations.

Rules vary by firm, account type, and program. Always review the current Apex Trader Funding rules before trading. Pay particular attention to trailing drawdown, contract limits, permitted products, trading hours, consistency requirements, and payout conditions.

CK’s evaluation framework is straightforward:

  • Trade the smallest practical position size.
  • Consider micro contracts such as MES or MNQ while building consistency.
  • Risk a small, predetermined amount per trade.
  • Limit yourself to one to three high-quality setups per day.
  • Stop trading after reaching your personal daily loss limit.
  • Never widen a stop to avoid accepting a loss.
  • Do not add to a losing position.
  • Take reasonable profits rather than waiting for a home run.
  • Journal every trade and identify whether you followed the plan.

A trailing drawdown makes unrealized profit especially important. If a trade moves significantly in your favor and then reverses sharply, the account’s threshold may have moved higher while your realized profit remains small. Consider taking partial profits or protecting a portion of the trade once the setup reaches a meaningful multiple of your initial risk.

The goal is to build a cushion: not to repeatedly approach the danger line.

WHERE ATA FITS INTO THE PROCESS

The Automated Trade Assistant (ATA) is a TradingView-based algorithmic tool designed to help traders analyze market conditions with greater structure and efficiency.

ATA can assist with:

  • Highlighting potential supply and demand areas
  • Identifying momentum shifts
  • Organizing entry and exit information
  • Filtering some low-quality or conflicting conditions
  • Supporting stop-loss and risk-planning decisions

ATA is not a substitute for judgment, and no algorithm can eliminate market risk. Use it as a decision-support tool: not as an excuse to abandon your trading plan.

The cleanest process is:

  1. Identify the higher-timeframe bias.
  2. Mark the strongest zones manually or with ATA support.
  3. Wait for price to approach the zone.
  4. Review momentum and structure.
  5. Execute only if the complete plan is valid.
  6. Manage the position according to predefined risk.

Learn more about improving your TradingView process in CK’s guide to TradingView indicator tips.

Professional trading workspace with live charts and market analysis

THE DAILY FLOOR-TRADER ROUTINE

Before the session:

  • Review the higher-timeframe trend.
  • Mark major supply and demand zones.
  • Identify the nearest opposing zone.
  • Check scheduled economic news.
  • Choose your maximum daily risk.
  • Decide which instruments you will trade.

During the session:

  • Wait for price to reach your area.
  • Avoid chasing candles away from the zone.
  • Confirm the structure before entering.
  • Record your entry, stop, target, and reasoning.
  • Stop when your daily rules say to stop.

After the session:

  • Save a chart screenshot.
  • Grade the quality of the zone.
  • Record whether you followed your rules.
  • Note emotional decisions.
  • Identify one improvement for the next session.

This routine removes noise and turns trading into a repeatable operating process.

READY TO LEVERAGE APEX TRADER FUNDING?

You do not need thousands of dollars in personal capital to begin learning how to trade with structure. Depending on current promotions, an evaluation may be available for as little as $20, while successful traders may pursue access to significantly larger buying power.

That opportunity comes with responsibility. Treat the evaluation as a professional risk-management test. Use CK’s clean charting method, focus on high-quality supply and demand zones, and maximize consistency before increasing size.

GET UP TO 90% OFF APEX TRADER FUNDING

Use affiliate code: KZRKEGJN

Start your evaluation through the direct link below:

CLAIM YOUR APEX TRADER FUNDING DISCOUNT NOW

Review all current rules, fees, risks, and eligibility requirements before purchasing. Results are not guaranteed, and trading involves substantial risk.

YOUR NEXT STEP

Start with one market, one session, and one clean setup model.

Mark your zones. Wait for structure. Define your risk. Execute without chasing. Then review your performance honestly.

For a deeper foundation, read CK’s five-step guide to passing a prop firm evaluation and explore the ultimate futures trading guide.

Financial freedom is not built from random trades. It is built through preparation, discipline, community, and mastery. Clean the chart. Protect the account. Seize the next qualified opportunity.

Prop firm trading dashboard illustrating systematic analysis and risk-managed execution